将本地文件夹添加到Git仓库
1、(先进入项目文件夹)通过命令 git init 把这个目录变成git可以管理的仓库
1 | git init |
2、把文件添加到版本库中,使用命令 git add .添加到暂存区里面去,不要忘记后面的小数点“.”,意为添加文件夹下的所有文件
1 | git add . |
3、用命令 git commit告诉Git,把文件提交到仓库。引号内为提交说明
1 | git commit -m 'first commit' |
4、关联到远程库
1 | git remote add origin https://github.com/githubusername/demo.git |
5、获取远程库与本地同步合并(如果远程库不为空必须做这一步,否则后面的提交会失败)
1 | git pull --rebase origin master |
6、把本地库的内容推送到远程,使用 git push命令,实际上是把当前分支master推送到远程。执行此命令后会要求输入用户名、密码,验证通过后即开始上传。
1 | git push -u origin master |
状态查询命令
1 | git status |
git查看远程仓库地址命令
1 | git remote -v |
windows 10 下查看端口占用情况
进入命令操作符界面,执行 netstat -ano | findstr 端口号, findstr是一个模糊搜索操作,类似于linunx中的grep

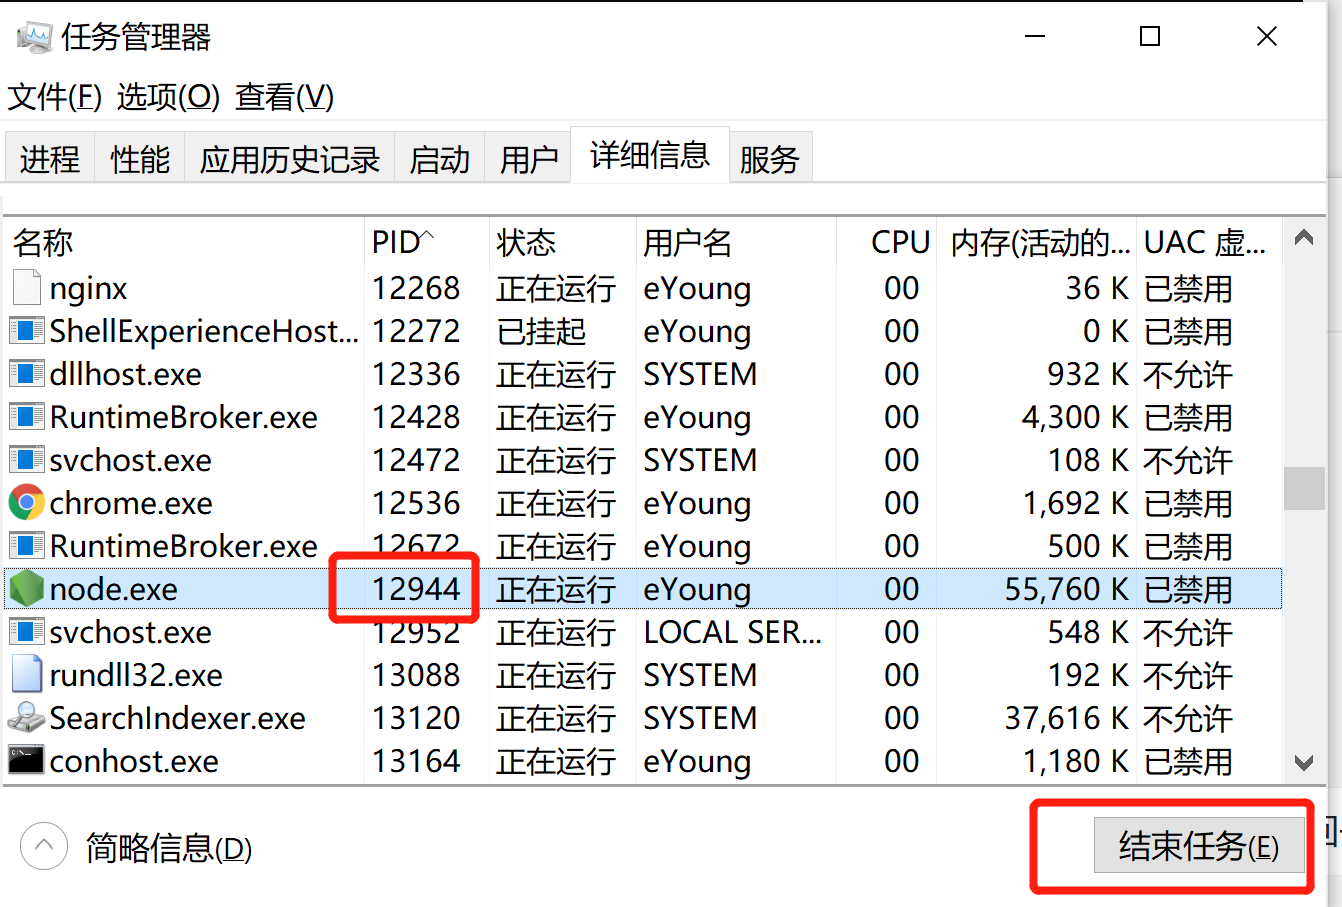
此时可以看到端口号当前使用的协议,本地地址,外部地址,状态,PID,找到PID后,可在任务管理器详细信息中找到相应的进程,,如需要结束进程,可选中进程后点击结束任务即可

结束!
Welcome to Hexo
Welcome to Hexo! This is your very first post. Check documentation for more info. If you get any problems when using Hexo, you can find the answer in troubleshooting or you can ask me on GitHub.
Quick Start
Create a new post
1 | $ hexo new "My New Post" |
More info: Writing
Run server
1 | $ hexo server |
More info: Server
Generate static files
1 | $ hexo generate |
More info: Generating
Deploy to remote sites
1 | $ hexo deploy |
More info: Deployment
Linux查看硬件信息
先来个常用的命令集合
1 | [root@i-1d1eb16b capinfo]# cat /etc/redhat-release | xargs echo '版本 ' && dmidecode -s system-product-name | xargs echo '是否虚拟化 ' && cat /proc/cpuinfo |grep "processor"|wc -l | xargs echo 'cpu核数' && cat /proc/meminfo | grep MemTotal | awk '{print $2/1024/1024}' |xargs echo '内存总量(GB)' |
系统
1 | # uname -a # 查看内核/操作系统/CPU信息 |
资源
1 | # free -m # 查看内存使用量和交换区使用量 |
磁盘和分区
1 | # mount | column -t # 查看挂接的分区状态 |
网络
1 | # ifconfig # 查看所有网络接口的属性 |
进程
1 | # ps -ef # 查看所有进程 |
用户
1 | # w # 查看活动用户 |
服务
1 | # chkconfig --list # 列出所有系统服务 |
程序
1 | # rpm -qa # 查看所有安装的软件包 |
查看网卡型号
1 | # lspci | grep Ethernet |
查看内存和cpu最直接最常用的命令
1 | # free |
查看硬盘信息(查看硬盘型号和硬盘序列号)
1 | # df -h |
修改系统ulimit
1 | vi /etc/security/limits.conf ##这个是重启后生效 ,现在立刻生效的话 ulimit -n 65535 |
查看网络连接数
1 | # netstat -an |wc -l |
查看不同状态的连接数数量
1 | # netstat -an | awk '/^tcp/ {++y[$NF]} END {for(w in y) print w, y[w]}' |
[root@i-3f83907a ~]$ netstat -an | awk ‘/^tcp/ {++y[$NF]} END {for(w in y) print w, y[w]}’
LAST_ACK 7
LISTEN 23
CLOSE_WAIT 78
ESTABLISHED 1202
FIN_WAIT1 4
FIN_WAIT2 10
CLOSING 2
TIME_WAIT 28
查看每个ip跟服务器建立的连接数
1 | # netstat -nat|awk '{print$5}'|awk -F : '{print$1}'|sort|uniq -c|sort -rn |
[capinfo@i-3f83907a ~]$ netstat -nat|awk ‘{print$5}’|awk -F : ‘{print$1}’|sort|uniq -c|sort -rn
320 10.195.173.29
312 10.195.173.36
304 10.195.173.40
77 172.18.36.16
17 127.0.0.1
13 172.18.31.100
12 0.0.0.0
…(PS:正则解析:显示第5列,-F : 以:分割,显示列,sort 排序,uniq -c统计排序过程中的重复行,sort -rn 按纯数字进行逆序排序)
查看每个ip建立的ESTABLISHED/TIME_OUT状态的连接数
同步服务器时间
在线同步
设置时区
- 查看当前时区
date -R+0800 表示时间为东8区,即北京时间1
2[root@localhost /]# date -R
Sat, 14 Dec 2019 19:25:39 +0800
若显示结果为非当前时区时间,可以进行设置 - 设置当前时区
1
2
3
4
5
6
7
8
9
10
11
12
13
14
15
16
17
18
19
20
21
22
23
24
25
26
27
28
29
30
31
32
33
34[root@localhost /]# tzselect
...
5) Asia
...
11) none - I want to specify the time zone using the Posix TZ format.
#? 5
...
9) China
...
17) Iraq 34) Pakistan
#? 9
Please select one of the following time zone regions.
1) Beijing Time
2) Xinjiang Time
#? 1
The following information has been given:
China
Beijing Time
Therefore TZ='Asia/Shanghai' will be used.
Local time is now: Sun Dec 8 21:07:46 CST 2019.
Universal Time is now: Sun Dec 8 13:07:46 UTC 2019.
Is the above information OK?
1) Yes
2) No
#? 1
You can make this change permanent for yourself by appending the line
TZ='Asia/Shanghai'; export TZ
to the file '.profile' in your home directory; then log out and log in again.
Here is that TZ value again, this time on standard output so that you
can use the /usr/bin/tzselect command in shell scripts:
Asia/Shanghai安装ntp服务
- 安装ntp服务命令:
1
apt-get install ntp 或者 yum install ntp
ntp服务相关命令
检查ntp服务状态命令
systemctl status ntpd
启动ntp服务命令systemctl start ntpd
设置开机启动ntp服务systemctl enable ntpd开始同步时间
1
2
3将服务器ip时间与本地时间同步
注意:若不加上-u参数, 会出现以下提示:no server suitable for synchronization found
ntpdate -u 服务器ipntp常用服务器:
中国国家授时中心:210.72.145.44
NTP服务器(上海) :ntp.api.bz
美国:time.nist.gov
复旦:ntp.fudan.edu.cn
微软公司授时主机(美国) :time.windows.com
台警大授时中心(台湾):asia.pool.ntp.org
至此服务器时间同步完成。
离线同步
1 | # 设置时间 2019-12-14 18:00:00 |
Welcome to Hexo